Search This Blog

Showing posts with label Linux OS. Show all posts

Tuesday, 7 July 2015

basic linux/unix terminal commands

linux/unix are the open source operating systems that allow user to access everything free of cost.
most of the work in these type of operating systems is done by terminal,a command shell

down below are some commands that are used in terminal

1.(A)  ls = to view contents in a directory
ls -a = to view hidden contents

1(B) ifconfig = to view mac address , ipv4 and ipv6 address


1. cd = to change path between directories

cd / destination       
to go back in directory you can type cd ..
to go next directory type cd ./directoryname
to go some other directory type cd /path from root

2. exit = to close the terminal

3.su = allow to login as super user which has the access to each content of os

 type su then root password

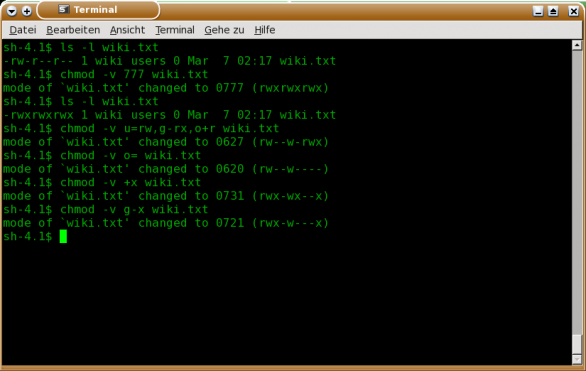
4.chmod = is used to give permission to access by user

chmod 777 /desktop/cp.txt  will give read,write and executable permissions to all


for more help about chmod go this link
http://www.computerhope.com/unix/uchmod.htm

5.mkdir = is used to create a diretory

mkdir /desktop/directory name

6. touch = to create a file

touch /filepath/filename

7.cat = to view content of file

cat /filepath/filename

it can't edit the file

8.vi = to edit the file

vi /filepath/filename

to insert,add or delete  press i
to save and exit press esc and :wq
to exit without saving press esc :x


how to find dns server on linux host

it is very easy to find dns on dns host 

1.open terminal 
2.login as root user (type su press enter and enter your root password )
3.once you logged in then type :
 cat /etc/resolv.conf


then it will shows nameserver1  
which is actually your dns 

Friday, 3 July 2015

how to create a network on virtual machine in centos host

Managing services using SysVinit


Before you start, if you are more familiar with the chkconfig or service commands, you may wish to review the SysVinit to Systemd Cheatsheet. Boot up your Centos host system, login with your learn id and use Firefox to authenticate yourself on SENEnet so you can download and install new software.

Open a terminal window and su to root (or use sudo before each command).  Ensure your system date and time are correct, and that your system is up to date by issuing the following command:

sudo yum -y update

Now boot up your VMs, log in, and update them too.  You will want to be able to communicate with your machines using ssh.
Check the ip address of the virtual machine by running the following command on each one. 

ip address show

Start the ssh service on the virtual machine. Also set the service to start automatically when the machine boots. 

sudo systemctl start sshd

Enable sshd to start at boot 

sudo systemctl enable sshd

Use ssh to connect from your host to the virtual machine.

You will be prompted to store the virtual machine's identification. Choose yes. This allows your machine to store a 'fingerprint' of the machine you are connecting to. From now on, when you connect to that machine, it will compare the fingerprint you have stored to the one available on that machine. If you connect to a machine and that fingerprint has changed, it is often an indication that something has gone wrong.

Reboot the virtual machine and check the status of your ssh service.


Testing Connectivity

In order to allow easier access to each of your VM's, we will configure them to use a static IP address using the sample configuration provided below. centos1 should use the first available address in the subnet (the second assignable IP, as network manager uses the first assignable for the host), centos2 the second and centos3 the third.

This should be done using the command line on all 3 virtual machines (steps outlined below). Make note of the files used and entries required.

To view the available interface (should be eth0 but may sometimes be eth1) and it's configured ip address. Make note of the device name and hardware or mac address when you issue the following command: 

ip address show

The file we need to edit to assign a static IP address is located in the directory /etc/sysconfig/network-scripts, and is named (note: you must create this file initially) ifcfg-eth# where # is the number corresponding to the interface you wish to assign a static ip address (obtained using the previous command). Sample syntax follows:
DEVICE="eth0"
IPADDR="192.168.0.2"
NETMASK="255.255.255.0"
GATEWAY="192.168.0.1"
HWADDR=mac address for the device
ONBOOT="YES"
NM_CONTROLLED="YES"

Bring the interface down and back up to apply the changes (using ip link or ifdown/ifup). Try to ping www.google.com, note there is no DNS resolution.

Issue the command cat /etc/resolv.conf, and observe the contents. This is the dns resolution library source. Edit your interface config file and add the following parameter at the bottom where x is your network number:
DNS1="192.168.x.1"

** Note: 8.8.8.8 and 8.8.4.4 are two free public DNS servers provided by Google. They are great addresses to remember when testing DNS.

Bring the interface down and back up again to apply the changes. Look at /etc/resolv.conf (using cat) again and notice the difference.

Remember these files, as we will be adding these additional options in lab 3.
  • DNS2=
  • DOMAIN= 
Test connectivity by pinging each of your VM's.

Try to ssh from the guest to the host machine, then from the host to the guest.

Try to ping matrix and google from your host machine. Record the ip address of each.

Try to ping matrix and google from each of your VM's to ensure you can reach the outside world (you will need to be authenticated to the network on your host machine).
 
User management

Find a partner for this step and create a user on your host machine that matches the user on their host.

Create a password for that user, but do not share it with your partner.

Have your partner run the following command on their host machine: 

ssh-keygen -t rsa

When you enter this command just hit ENTER for all the questions (though you may wish to set a passphrase for your key – remember what it is if you do!).

Your output should look something similar to this: 

Generating public/private rsa key pair. 
Enter file in which to save the key (/home/jmcarman/.ssh/id_rsa): 
Enter passphrase (empty for no passphrase): 
Enter same passphrase again:
Your identification has been saved in /home/jmcarman/.ssh/id_rsa. 
Your public key has been saved in /home/jmcarman/.ssh/id_rsa.pub. 
The key fingerprint is: f5:07:8c:aa:b6:08:e0:45:81:ca:d6:88:8c:aa:1a:7b jmcarman@c6host.jmcarman.org 
The key's randomart image is: 
+--[ RSA 2048]----+ 
 |      o+++           | 
 |  E .ooo..             | 
 |    ...o.                | 
 |       ...o .            | 
 |     .S+ + o.        | 
 |   . = . o .           | 
 |     o +               | 
 |  o +                  | 
 | . .                     | 
 +-----------------+


When you run that command you generate both halves of a paired-key encryption scheme. In order to be able to log in to another machine without a password, each machine needs one half. You keep the private key (in this case id_rsa), and you give the public key (id_rsa.pub) to the machine you want to log in to.

Issue the command ssh-copy-id username@ipaddress, and have your partner enter their credentials and password.

Have your partner attempt to ssh from their host to yours.

If they are prompted for a password, you have done something wrong. Make sure the path is correct, and that no one other than that user has write permission to their .ssh directory or the authorized_keys file (If anyone does, even that user's group, the ssh service will not consult that file).

Once they have successfully logged in without a password, use the usermod command to change their default shell to /sbin/nologin (with the -s option). They should no longer be able to log in.

You can use this command to edit many other things about your users, including their home directory, the group they belong to, their user id, etc.

Applying What We've Learned

Repeat these steps (for your own user) on your host and virtual machines, until you can ssh into each without a password

Your first attempt to ssh, a prompt will appear asking you to enter the passphrase (the one you entered when you created the key). Check the box that says "Automatically unlock this private key when I login"


Configuring a Service

A common, if somewhat blatant, way to try to hack into a machine is to try to ssh as root and brute-force the password.  The root user always exists, meaning the attacker doesn't need to try guessing what user names are on your system.  If they can get access to root, they can do anything.  To prevent this, we'll edit the configuration file for the ssh service to prevent root from ssh'ing into your host machine.

Use cat to display /etc/ssh/sshd_config on your host.

This file contains the configuration parameters for the ssh service.  Lines that begin with # are comments. Either simple explanations of parameters, or parameters that have not been set.

Open the man page for sshd_config.

This lists all the possible parameters in alphabetical order along with a brief explanation of what each one does.  The parameter we are looking for is PermitRootLogin, read its description.

Use an editor (e.g. vi) to open /etc/ssh/sshd_config, and find the line that has PermitRootLogin.

By default it is set to yes, allowing the root user to ssh in to the machine.
Uncomment it, and change it to no.

Now try to use ssh from one of your VMs to log into your host as root.  You'll still be able to. This is because (for most services) the changes you make to the configuration file do not take effect until the service restarts.

Restart the sshd service on your host and try to ssh in again. Now it should prevent you.

The configuration files for most services follow a very similar format. Some use an = between the parameter and its value, some require you to group certain parameters together, and most use # to be a comment. You will get lots of experience working with the configuration files for services in this course.
Completing the Lab
Thursday, 2 July 2015

how to install virtual machines in centos host

Installing the virtualization software
You can now execute any command that requires elevated privileges without switching to root, as long as you type sudo before it and supply your user password (not your root password).  You will need to install some software to allow your machine to act as a host for virtual machines

sudo yum -y install @virtualization virt-manager libvirt

Start and enable the virtualization service
sudo systemctl start libvirtd
sudo systemctl enable libvirtd

Note that when starting libvirtd you may receive a warning 'virGetHostname: getaddrinfo failed for "Machine Name": Name or service not known. This will not interfere with your machines.

Reboot your machine (if you have not already as part of the installation process). If you do not, you will not be able to install any virtual machines.  Start the graphical virtual machine manager.  You will need to enter your root password.

Create your own virtual network
  1. Right click 'localhost (QEMU)' and select 'Details'. Click on the 'Virtual Networks' tab.
  2. Stop and delete the 'default' network.
  3. Use the plus sign to add a new virtual network using the following options.
    • Name your virtual network 'centos7'
    • Use the network address space as you want . Example, if you were want 11, the network address would be 192.168.11.0/24.
    • Ensure the DHCP range will allow you to assign at least 3 static IP addresses outside it.
    • Choose 'Forwarding to physical network' radio button, 'Destination: Any physical device' and 'Mode: NAT'
    • Ensure the network is started at boot.
  4. Once completed open a terminal and observe and record the output of the following command:
iptables -t nat -L

Installing a Virtual Machine

With the virtualization software installed and your personal network created, you are now ready to create your first virtual machine.  Use your Centos 7 installation dvd (or alternately you can copy the ISO image to your hard drive and install from that).  The later option will result in a slightly faster install.

Installation

  • Click on the icon "Create a new virtual machine" to begin.
  • Name your machine "centos1" and choose your installation method - "Local install media". Choose the desired option to install from either the CD or iso. For "OS type" select "Linux" and for Version select "Red Hat Enterprise 6" then click on the "Forward" button.
  • Use the default memory and CPU options for use with lab computers (Depending on available hardware these settings can be adjusted). Then click on the "Forward" button to proceed.
  • Leave the disk image size set at 8GB, ensure "Allocate entire disk now" is checked, then click on the "Forward" button.
  • At the "Ready to begin installation" window click on 'Advanced options' arrow to review available options.
    • Select the Virtual Network named 'centos7'. Make note of any other available options .
  • Select 'Install to Hard Drive' to begin your Centos installation. Select the appropriate default options ).  The installation process should be identical to what you chose on the host, with the exception of the hostname.
  • During installation you will be prompted to set the root password and an initial user account. For the initial user, enter the same information you entered on your host machine.
  • Set your hostname to "centos1".

First Boot

  • You may notice that graphical windows are not being displayed properly. The following steps will resolve this.
    • At the first opportunity, shut the VM down. If you perform these steps while the machine is running it will claim they will be applied the next time the machine boots, but that does not work.
    • While the VM is off, click on 'View' (from the menu at the top of the VM window), and select 'Details'.
    • From the menu on the left side, select 'Video'.
    • Change the drop-down list for Model from 'Cirrus' to 'vga', and click apply.
    • Switch the view back to 'Console' and start the machine again.
  • Ensure your machine has a network connection by running the command
host cbc.ca
If that did not work, edit the line in /etc/sysconfig/network-scripts/ifcfg-eth0
onboot=no
should be
onboot=yes
  • If you had to change that, bring the interface down and back up again
sudo ifdown eth0; sudo ifup eth0
  • Once you have a working connection update your machine (this may take a while -- while you are waiting it is probably a good idea to update your host as well).
sudo yum -y update
  • Reboot the virtual machine once it is updated.
  • If your virtual machine hangs on boot, you will need to change a graphics option:
    • While the VM is off, click on 'View' (from the menu at the top of the VM window), and select 'Details'.
    • From the menu on the left side, select 'Display'.
    • Change the drop-down list for Type from 'VNC' to 'Spice', and click apply.
    • Switch the view back to 'Console' and start the machine again.
  • Now run the following commands and note the output. Note how they differ from the Centos installation on your host.
df -hT
cat /etc/fstab
cat /etc/issue
uname -a

Cloning a Virtual Machine

  • Now that you have one virtual machine working, you will create two more. If you struggled with the previous steps, repeat them to create two more virtual machines (naming them centos2 and centos3, with hostnames centos2 and centos3 respectively).
  • If you are confident with what you have done so far, you may clone your existing machine to create the others.
    • To quickly create additional VM's shutdown 'centos1', right click and select 'Clone...'. Use the following options:
  • Name: centos2
  • Storage:
    • Click the drop down menu below 'centos1.img', choose details and rename the image to the centos2.img
    • Once successfully created boot the new VM and correct the host name. This can be done using the GUI or command line.
    • Record in your notes how each is done.
    • Check for connectivity.
host cbc.ca
    • After creating centos2 repeat the above steps to create centos3 and correct the host name.

Backing up your Virtual Machines

You are responsible for backing up your virtual machines on a regular basis.  It is good practice to copy your back ups to a separate location (like a USB Flash Drive) once completed, so in the event your drive becomes damaged to the point that you can't access them all you need do is reinstall the host and restore your back ups.  i will upload info how to back up VMs in my next blog
thank you

Wednesday, 1 July 2015

how to install linux based operating system centos7 on your host

Installation

Installation instructions for Centos 7

  1. Download a copy of the Centos 7 installation DVD (64 bit edition) from the Centos web site or burn the DVD using Seneca's Freedom Toaster which is located in the Open Lab on the 2nd floor of the TEL building. Note: we'll be using the 64 bit version of Centos because all of our lab computers are equiped with Intel 64 bit mainboards and CPUs. We'll also be using a Fedora iso for installing the virtual machines, but you will not need to burn that to a disc. It is faster to download the ISO and install directly from it. Finally, if you're going to burn your DVD using the Freedom Toaster then be sure to use a blank DVD-R disc. DVD+R discs sometimes fail to burn successfully.


  2. Insert your HDD into the docking bay of a PC in the lab and boot the computer using your installation DVD. If possible try to use the same PC for this course for the rest of the semester. Some PCs may be configured with slight hardware variations from others which may cause problems when moving your HDD from one system to another.
  3. Perform your installation following these guidelines:
    • wherever possible select the default options
    • set your hostname to your learn ID.
    • set Toronto as your time zone
    • For the installation type, choose 'Graphical Server'
    • set the root password
  4. After completing the installation, remove the DVD and reboot from your HDD.
Tip: Boot Menu
If you got the boot failure message, restart the computer and press [F10] to get to the boot menu, select the Hard Disk as boot device and continue.

Booting your system

  1. create a user named with your learn ID
  2. Login as the user you created and open a terminal window. Then use 'su' to become root and run the 'yum update' command. Reboot after all updates have completed. Now that your system is up to date, again login using your learnid and do the following:
    • Verify that your system date and time are correct. If not then set the correct system date and time.
    • Verify that your network is functioning.
    • Run and record the output of the 'df -hT' command.
    • Run and record the output of the 'cat /etc/fstab' command.
    • Run and record the output of the 'cat /etc/issue' command.
    • Run and record the output of the 'uname -a' command.
  3. Under Applications > System Tools right click both "Terminal" and "Virtual Machine Manager" and select "Add this launcher to panel"

Configuring a Linux Gateway

At this point you have a basic Centos 7 installed and updated. This will serve as a host for the virtual machines where you will do the majority of the work in this course. All the rest of our labs will assume you have this basic system running. If, for any reason, your system becomes corrupted during the semester, you'll have to redo this lab to be able to continue with the remaining uncompleted labs. You are responsible for YOUR system. If you do not perform back-ups you have taken this risk on yourself. Poor planning on your part does not constitute an emergency for anyone else.
Configuring Sudo
Switch to root using su or su- (remember su- switches you to root and places you in root's home directory, with root's profile settings.  su switches you to root, but with your current user's profile settings and does not change your working directory).

Issue the following command:

visudo

Wikipedia has useful information on why we use visudo instead of directly editing the /etc/sudoers file.  It is worth looking at as it may appear on next week's quiz.  http://en.wikipedia.org/wiki/Sudo#Tools_and_similar_programs

Sudo can be configured to allow multiple users administrative access without giving anyone else the root password.  Additionally you can configure sudo to only allow users to execute specific commands with elevated (root) privilges.  Sudo works much the same as Run As Administrator in Windows.  For additional information, I found this video provided a very good explaination:

After issuing the visudo command, find the line that reads as follows:

root ALL=(ALL) ALL

What this means is allow root to run from any terminal (first all), acting as any user (second all), and execute any command (third all).  Below this line, add the following (without the curly braces):

{learnid} ALL=ALL


Configuring your Hostname

Configure your hostname on your host OS to be c6host, by issuing the following command.

sudo vi /etc/hostname
Configure your hostname on your host OS to be c6host, by issuing the following command.  Change the line that reads HOSTNAME=localhost.localdomain (or whatever it contains if it does not exactly match this) to the following:
c7host

Note that this change will not take effect until after you reboot, however since you will need to reboot to apply other changes later that  makes sense to do this all at once.

Installing the virtualization software